Questions and bubbles
Question 1
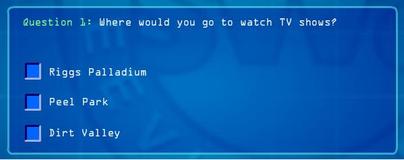
Riggs paladium
Question 2
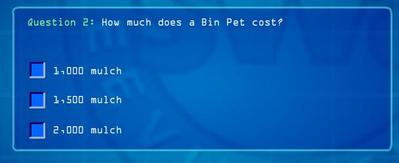
1,500 mulch
Question 3
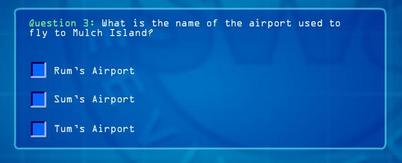
Rums Airport
Question 4
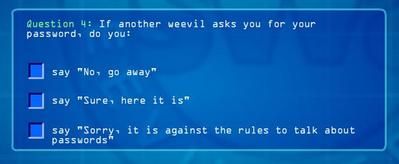
say sorry it is against the rules....
Question 5
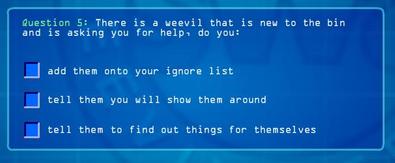
Tell them you will show them around.
Question 6
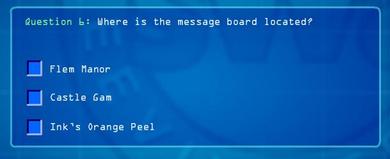
Inks orange peel.
Question 7
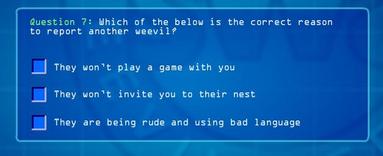
They are being rude and using bad language.
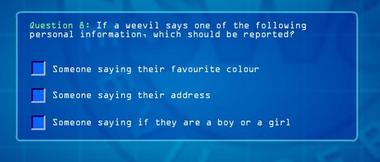
Question 8
Bubble locations
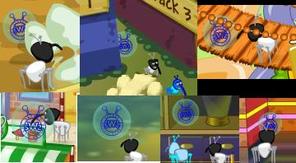
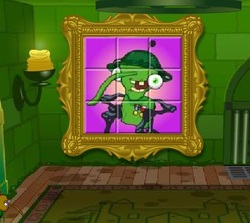
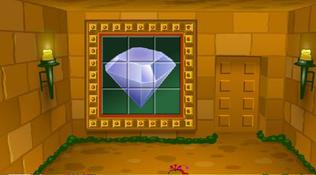
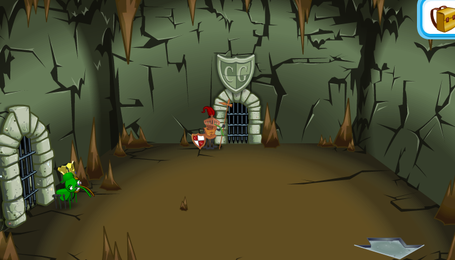
The Lost Silver Knight
finding the key
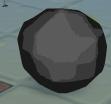
The key is directly behind this Rock
Using the key
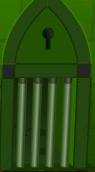
Use the key to open the door inside Gams to start the mission
The secret code.
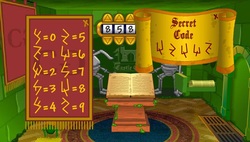
You need to find the arrows on certain bricks of the wall untill you find the code then with the coded numbers crack the code.
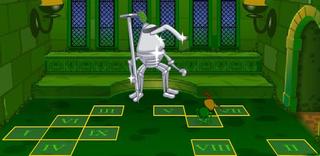
The puzzle.
There is no guide here you need to complete this puzzle.
Chimes
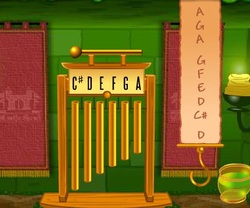
Firstly grab the hook in the corner and drag down the wet me scroll, now you need your brush, dab it into the water and wet the scroll. once the instrument appears you need to play the note on the scroll. and then more notes appear in blue, do them and you have passed this bit.
Numerals
If you no your numerals then this piece is easy all you have to do is jump on the numbers in numerical order.
Lost silver knight rewards.
1,000 mulch and 200 exp.

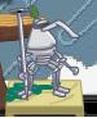
Silver knight trophy
The blue diamond part 1
Finding the key.

You will need to grab the battery and attach that to the metal detector and then attach the thing to the wheel that you will need to turn in order to get the shovel. use the metal detector to hover around till it buzzes and you find the key. to get to the other side you will need super jump, as previously obtained from ships maze.
Puzzle
Another puzzle, you need do exactly same as last time.
Shapes
To get the triangle first you will need to gather the sticks next to the water barrel and put them in the round object next to the container holding the circle. move that object underneath the triangle and open the draw below from where you moved it from. there is a stick leaning below the light, pick that up put it below the triangle and use the band thing to rub against the stick eventually setting it a light melting through to the triangle.
To obtain the sphere you must get all three corks the first one is im the bottle in the corner of the screen facing V > then the second one is in the water barrel (wait for it to appear) and the third in the bottle below the grey weights. plug them into the holes of the giant cylinder shape and use the green mug to fill the cylinder with water bringing the circle to the top.
To collect the cube you must click the silver things below the scales, then put 2 grey weights on the left scale and 2 of the smallest silver ones. on the right one add the remaining silver ones first followed by the remaining grey, you have the square.
Teleport room
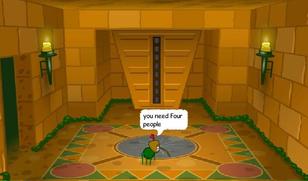
For this you will need 4 weevils, you and 3 others, you can do this with your pet aswell but all 4 people must stand on a red spot and then you will win the mission, if you have 4 standing on the spot and your in the middle your onto mission 3.
Blue diamond part 1 rewards
1,000 mulch and 200 exp

Blue diamond part 2
Getting here
picture coming soon! to get here you have got to have finished mission 2 to get here, when your in the maze by using four people on the teleport you can start with a maze.
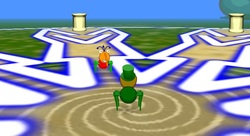
The Red one
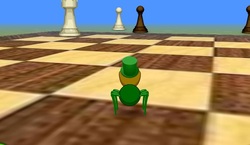
Once your here you will be on a chess board, here you need to have super jump (once aquired by ships maze) what you do is jump to a part of the board but only one of them will accept your landing, others send you back, you need to collect all the bubbles.
Yellow one
You need to go through this maze and get to the single bubble, but if you touch the edges it automatically sends you back to the start. also try to avoid the spirals as they turn you around making you loose track of where you were heading.
Pink one
You will star behind one of the bin shaped objects what you have to do is go along the maze (careful from touching the sides as they are really narrow) when you get to the spiral it will spin you to another one, collect all the bubbles basically.
Blue one
To get here you must travel down to the pad in the corner this will teleport you around to the blue pins enter and start, all you have to do is followe the maze through correctly until you reach the blue diamond.
Blue diamond part 2 rewards
1,000 mulch and 200 exp

Blue diamond trophy and teleport
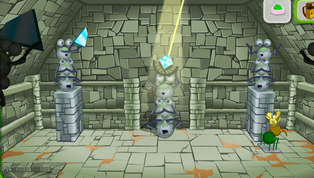
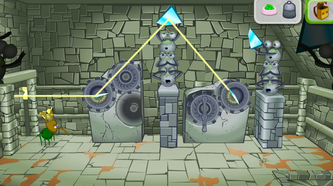
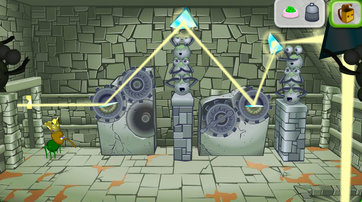
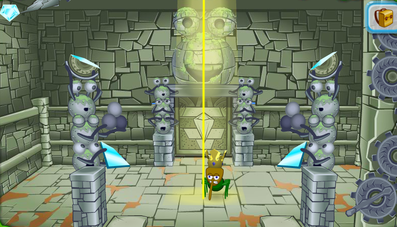
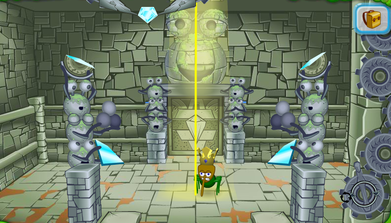
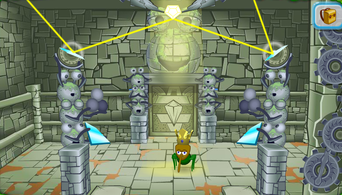
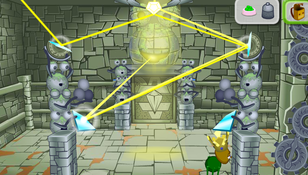
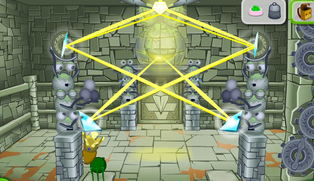
Totem of the aztecs
room 1
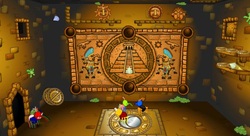
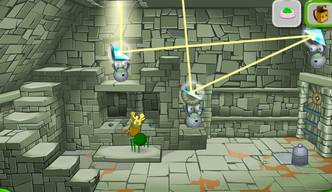
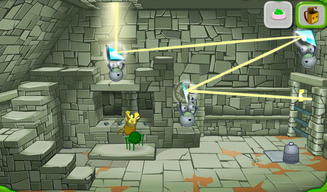
Here you must get the sun and moon plates in the big circles in the middle. the the extra coins in the room will fill the small holes. put the place the ice cream looking gem into its hole which is covered by the extra plate, remove the plate. now you will have to spin slowly the big circle in the middle. it should turn purple. once you done this a beam of light should shine through using the plates in the bottom left hand corner you need to reflect the light from the gem in the center to the em in the top left corner. once this part is done you will be moving onto the next room.
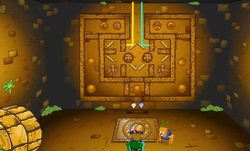
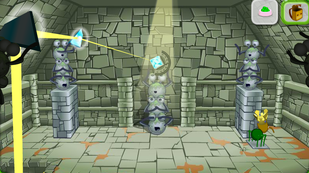
room 2

In this part you have to redirect the light with all the squares so that it hits the gem in the right hand side use the levers to turn the squares.
Main room

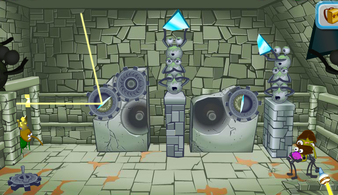
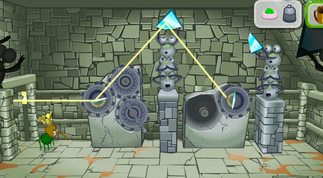
On this bit you must make a star shape by reflecting the light off the plates that you insert to the holes. then you will need to start turning them and reflect them so the blue light hits the blue gem and yellow hits the yellow gem.
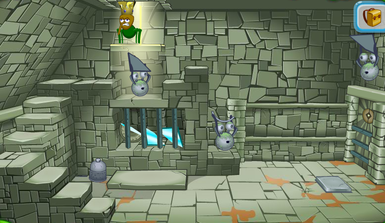
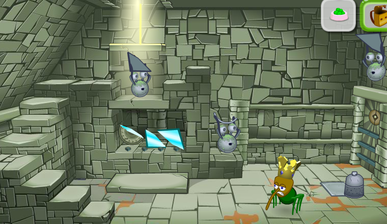
The basement
First of all move the moon onto the moon spot and the sun onto the sun spot. you then will be able take one of them out and start moving down. you basically need to get the 2 plates to the middle and use them to reflect the lights at the gems, remember blue-blue gem, yellow- yellow gem
Totem of the aztecs rewards
500 mulch and 50 exp
Totem statue
Jack and the binstalk
The beanstalk
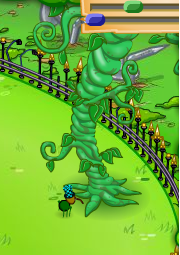
Firstly grow your beanstalk ready to climb up, it may take 3-6 days to grow.
In the Sky
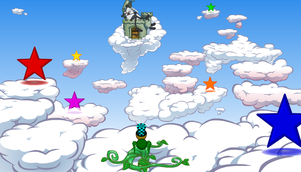
The objective here is to jump onto each coloured star in order, beginning with the red then the orange then the yellow then the green, the blue and finally the purple. once you done this your in the castle.
Puzzle
Again we have a puzzle, there isnt really a guide but the picture tells you what it looks like when its done, then you will need to use the key to open the door (put it in the puzzle) and enter to the next part.
The third room
here you need to insert the wheels to the correct place, the picture shows a guide of where they go. when you pull the lever the door will start to open, you can only do this successfully with all the wheels in the correct place.
Final part.

At this part you need to put all the pieces in the correct place, again the picture shows you. Then with the key open the cage and you have won the golden goose and completed the mission.
Jack and the binstalk rewards
Mulch and Exp

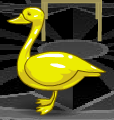
Golden goose.
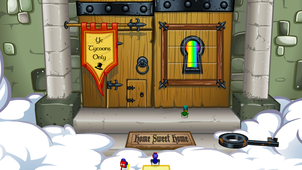
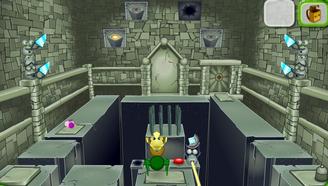
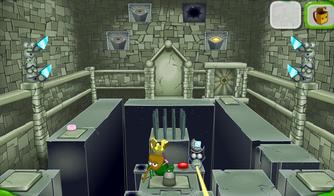
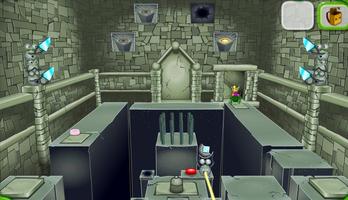
The trouble at Castle Gam
Entrance
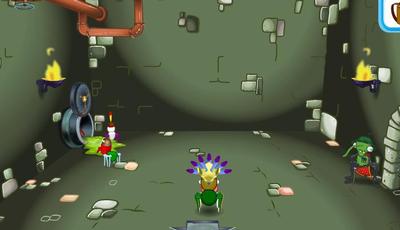
Firstly you need to accept the mission in SwS hq, then go in the door that says DUNGEONS and talk to gam, you will go over a few questions about the pipes, you will also have a unique backpack that you can put keys in, we will discuss this later in the mission. In your backpack you should have a key given by Gam, if you do unlock the gate and head on.
First guard
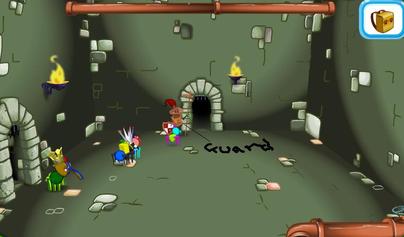
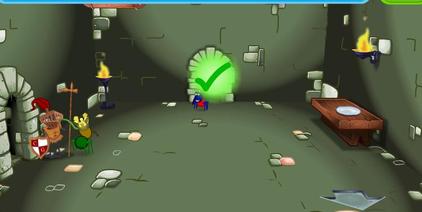
Now you need to talk to a guard, who is guarding the next door, talk to him and he will ask you three questions to have confirmation you spoke to Gam. Then you will be able to get through the next gate. in the next part take the left arrow.
Guard 2

Yes, another guard is here and you must speak to him. Then go through the next gate.
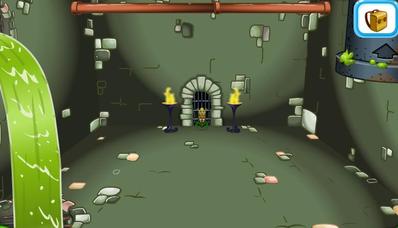
Dark room

in this room it is dark and your mouse pointer is the light, search and find a key in the room.
Right room
you should now of exited both of the 2 rooms, now use the key to unlock the right gate. Once in that room click the item in the right bottom corner and keep it in the backpack, go in the next room. in that room pick a pipe off the floor, near the slimefall. and then go up the pipe.
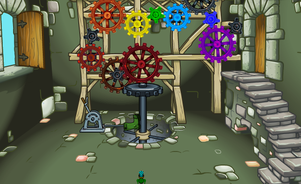
Fixing the pipes
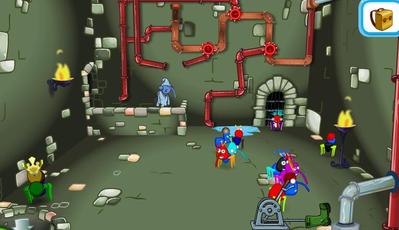
Firstly turn the wheels so that the arrows lead water to Kip (sleeping) he wants you to deliver the pen to Ink further in the Castle. Then go through the next gate.
next bit
Through the gate, there is another guard, and he seems hungry, feed him the apple that is on the plate. the pass the next gate. Do you remember Ships Maze, werll there is a puzzle you need to complete to obtain the key. Use the key to enter the gate at the top of the room
Dark room 2
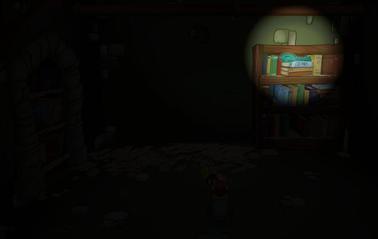
in this part you need to locate the book shelf with a key on top, collect that key
Use of the key
Now go back out of the dark room and out of the labrynth. use the key to open the door in the room where you found the apple.
DRAGON
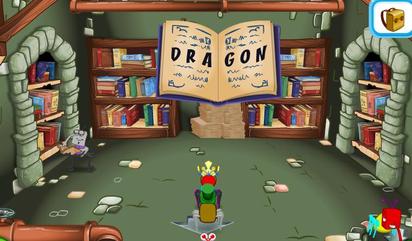
in this room you will find a book, and once opened it says Dragon, we will establish why. firstly give ink the pen, in trade for a key. and the book DRAGON is a code for something. Now go down the pipe. where you will have a code. the code is DRAGON spell that to get in the next room, but you need to use the key ink gave you to unlock it first
when you get through, go across to the pipe.
when you get through, go across to the pipe.
Slime pump room
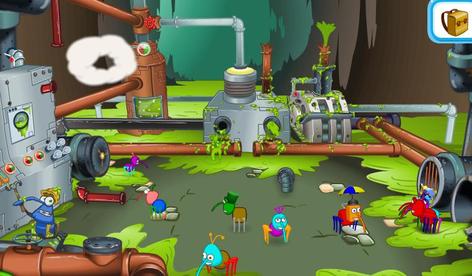
First of all, speak to Rigg who is trying to fix a pipe. pick up a pipe off the floor as well, it may come in handy, use the pipes to fill in missing gaps, also there are more grey pipes on the floor, use them to fill in the gaps too.
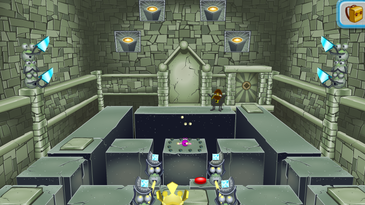
Trouble at Castle Gam part 2
Entrance
Firstly go into the entrance of the previous mission. and the part in the corner is where you go in. then go in the pipe on your right. and enter the gate.
first key
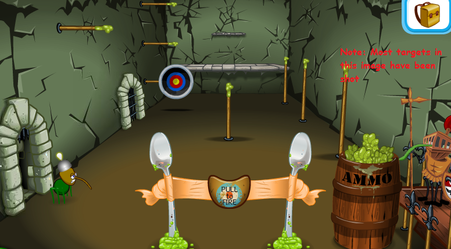
once you clicked the arrow in the room, you will enter a room with two sets of steps as well as a locked gate (there is also mulch droppings on the ground) to obtain that key, go in the other gate and complete a shooting game. shoot atleast 3 targets to unlock the gate. (the back targets have hidden 50 mulch behind) once you completed it you will need to walk over a bridge and into the back of the starting area. The treasure chest needs to be opened to obtain the key. the key is used for the locked gate.
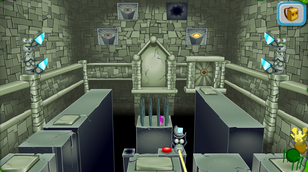
Down the hole
.When you enter the room, you will notice you've been previously there, go down the hole. Within this hole, and several other dark rooms within this mission, you need to find and pick up a shield piece using the torch. Each shield piece will fit to assemble a shield. you can use a light bulb in the top room (dark room) to light up the rooms. once you have assembled the shield, go to the next stage.
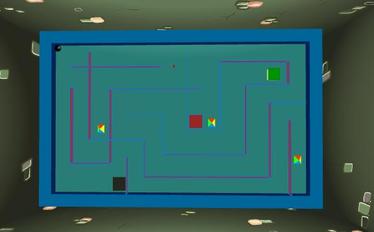
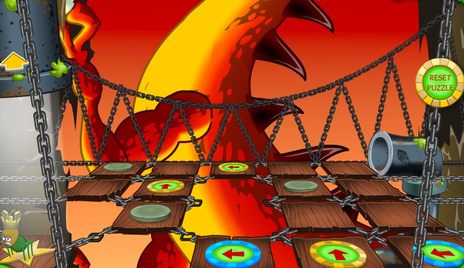
2 labyrinths (Ships maze)
In this room, go up the steps (doesn't matter which one is first) and complete the labyrinths, when you complete the labyrinths you will raise the lava levels, allowing you to enter the gate.
Puzzle
In this puzzle you must get to the stars, jump on the grey buttons to change the directions. When they turn blue it means you can jump further, there are 2 blue ones in the second puzzle, use the grey buttons to change the directions and the colors, you will need both of them blue.
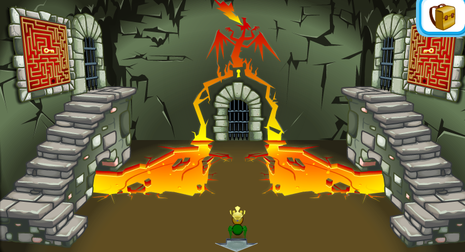
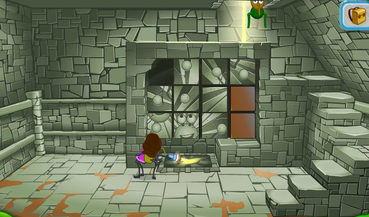
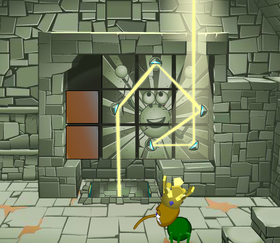
The dragon
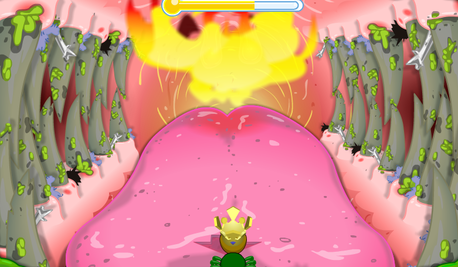
Firstly enter the dragons mouth, and when your in there, use your brush to clean his teeth, but make sure you hurry, because the firy breath makes you hot and will flush you out.
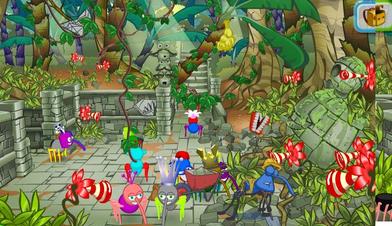
Raiders of the Lost bin pet
Accept the mission
To begin the mission accept the mission at gams.
Entrance
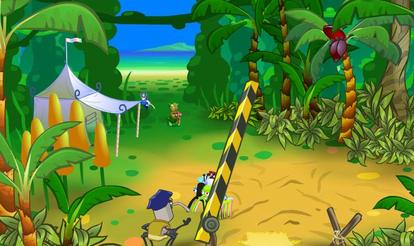
To start the mission head over to Mulch island, this will be the start of the mission
before entering answer the guards questions
Image here <
before entering answer the guards questions
Image here <
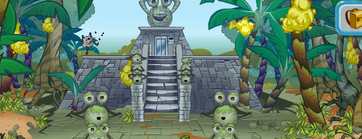
Outside the temple
Once you've entered the site, you will see an entrance to the temple, you also have your bagpack with pet food. speak to Digg who is there and answer him. find riggs stone pieces. in this area you may want to pick up the red hose, the binoculars in the bush and 2 tablet pieces which you will need soon.
tablet pieces
Firstly collect all objects here (the tablet piece) (hint: There is a piece hidden in the waterfall, to get it use your teeth and place them in the pets mouth)
Another piece can be found under the loose path stone in the right corner, to lever it out you will need your red hose thingy place it there and it will lever it our. you may also want to rustle the berries off the vine for use later. go back and go through the right side where the flies are. in there talk to Digg. once done that collect the tablet pieces in here as well as a set of teeth
Another piece can be found under the loose path stone in the right corner, to lever it out you will need your red hose thingy place it there and it will lever it our. you may also want to rustle the berries off the vine for use later. go back and go through the right side where the flies are. in there talk to Digg. once done that collect the tablet pieces in here as well as a set of teeth
The puzzle
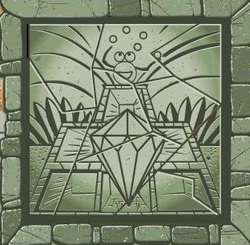
Now you have collected the tablet pieces put them together, by moving them into the correct places. just like a jigsaw puzzle. the puzzle completed will look like this
<
<
outside the temple
you can access this area once you completed the tablet puzzle.
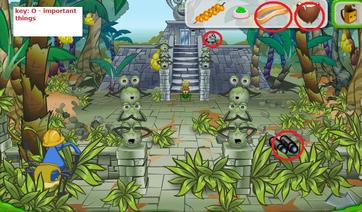
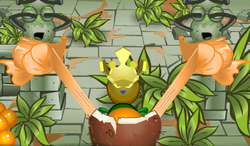
To begin you should talk to Diggs archaeologist , answer his questions to begin. it looks like he knows about the missing pet, and so does the guard on the temple. you must get in that temple, to do that we have to distract him. you will need your binoculars for this, that you picked up earlier, use them to look at the code up at the gate, the code is different for all weevils so remember to write it down. but you can't enter this until you have distracted that guard so Pick up the two items on the floor, the band and the coconut. With the band you have place it inbetween the two weevil statues and place the coconut in the band. we will leave this here and move onto the berries you picked up earlier, go back to the scent flowers and place the berries there so that the flies will be attracted to the scent.
To begin you should talk to Diggs archaeologist , answer his questions to begin. it looks like he knows about the missing pet, and so does the guard on the temple. you must get in that temple, to do that we have to distract him. you will need your binoculars for this, that you picked up earlier, use them to look at the code up at the gate, the code is different for all weevils so remember to write it down. but you can't enter this until you have distracted that guard so Pick up the two items on the floor, the band and the coconut. With the band you have place it inbetween the two weevil statues and place the coconut in the band. we will leave this here and move onto the berries you picked up earlier, go back to the scent flowers and place the berries there so that the flies will be attracted to the scent.
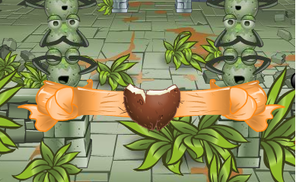
With the berries, place them back outside the temple, now you can use the coconut spring, place a berry within and fire at the flies nests. keep hitting the fly nests until you've hit all yellow nests once hit all fire another berry at the guard so the flies are attracted to him. Now he fell of you can enter that code.
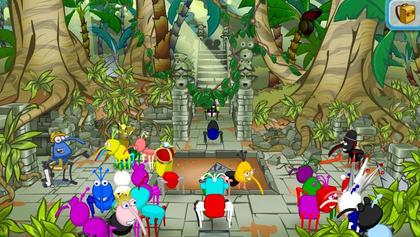
inside the temple
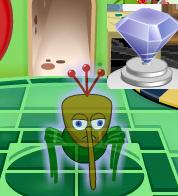
When you enter you will see the bin pet kidnapper, he jumps down a well and hides, in here you must find him. To collect the blue diamond jump on the tab infront of the statue so that it releases the diamond. With the diamond place it above the middle statue.
Just like in toem of the aztecs you have to turn the diamond so that the light shines on the blue glass on the left statue, then that light will be reflected to the left dark statue and down the hole. Now you can jump down the hole that the kidnapper jumped down.
2nd floor in the temple
When you get down here you will again see the kidnapper, he runs through a door. jump yourself down to the bottom and collect the silver weightobject, to collect it you need to jump on the slope next to it. once you have the weight go to the square slope near the door and place the weight there to open the gate to the blue glass.
Now you have access to two glass pieces and a semi circle object. take the two glass pieces and place them on the weevil statues hand. and the semi circle will go on the small pets hands in the middle to creat a light beam. now you have to turn the semi circle with glass in to make it shine at the door. once done that take back the weight and go through the door
3rd floor in the temple
When you enter, you again see the kidnapper, which i have finally got a mugshot of! there is a gear on the floor, move that and attach it with the other two gear.
Once the gear is in turn it so that it reflects off the glass on the statue then when it is there reflect it to the semi circle, to turn the semi circle to its correct position, take out the gear and place it in the other missing spot, next to the semi circle.
Once the gear is in turn it so that it reflects off the glass on the statue then when it is there reflect it to the semi circle, to turn the semi circle to its correct position, take out the gear and place it in the other missing spot, next to the semi circle.
Then reflect the light to the glass on the right bin pet statue which will open the floor in the corner.
4th floor of the temple
Again i got the kidnapper in a pic. he escapes again. walk down to the floor and you have to do a puzzle, just like the puzzle in the lost silver knight. simply complete the puzzle. once done the puzzle the light will shine through the puzzle and open the floor.
5th room of the temple
urgh. too many rooms in this mission. in this room use the bottom gear at the side to rotate the others and ring a crane with a diamond.
once you put the diamond under the light you should get the light beaming at the two cut open glasses.
Now jump infront of 1 of the statues and change the direction of the beam.so that it hits the left glass. same applies with the other statue
6th room in the temple
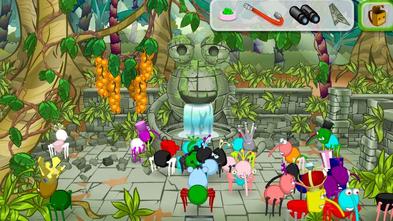
Here the kidnapper shoots down some paths and leaves the pet in this room you must save lady wawa.
To start off move your weevil where you are to jump so that a panel at the back appears, the one he knocked down.
To start off move your weevil where you are to jump so that a panel at the back appears, the one he knocked down.
If you can see the square diamond infront of you, turn it around so that it mirrors the blue glass on either side when you think you have it pointing the glass press the red button to shoot a red light beam, which will hit an image at the back, this activates a path which you can now walk on. walk on that path. once switching the button it will activate another path on the left side. but as soon as you move from that path the floors drop. the left sides button takes the bars away from lady wawa, but does not free her. You need to find a way to get into her cage and rescue her.
using your weight place it on the on the right button so you can get across the other side place her bowl of food on the button on the large patform on the left side. then go back to get your weight and place it on the left side. then go in the middle and shine the glass in the left top corner. like in the picture below
Now you will have to get over there. firstly re obtain that weight, with the weight place it on the right side. then cross to get lady wawa.
Now place her on your back and find a way out. take the weight again and place it in the middle button. Now just head across the right side to the button that will open the door
watch the cutscene and talk to tink
Well done you completed the raiders of the lost bin pet
You are now rewarded 1000 mulch
